How To Draw A Bunny: Easy Steps For Cute Rabbit Art
Is there anything more inherently charming than a bunny rabbit, its fluffy form and twitching nose promising a world of innocent delight? The simple act of drawing a bunny, capturing its essence on paper, is a gateway to creativity, a soothing exercise in observation, and a delightful pursuit for artists of all ages and skill levels.
From the whimsical charm of cartoon bunnies to the graceful realism of wild hares, these creatures have long captivated artists and animal lovers alike. Drawing a rabbit is a rewarding endeavor that combines fundamental artistic techniques with a touch of lighthearted fun. Whether you're a seasoned artist seeking a new subject or a beginner taking their first steps into the world of drawing, the bunny provides a versatile and approachable subject, perfect for honing your skills and exploring your creativity. There's an inherent joy in translating the form of a rabbit onto paper. The soft fur, the long ears, the inquisitive eyes each element contributes to the overall appeal. This is a guide that provides simple instructions and tutorials to master the art of bunny drawing.
| Subject Matter: | Bunny Rabbits and Rabbit Drawings |
| Key Techniques: |
|
| Essential Materials: |
|
| Difficulty Level: | Beginner to Intermediate |
| Key Concepts: |
|
| Inspiration & Resources: |
|
| Referance Website: | Wikipedia: Rabbit |
The journey begins with the fundamentals. Before diving into the details, it's essential to understand the basic shapes that form the rabbit's anatomy. Start with two intersecting circles one for the head and another, larger one for the body. Then, add a big oblong shape on one side. This initial framework is the foundation upon which the rest of the drawing will be built.
Refine the features: the head, nose, eyes, ears, and mouth. Draw a curved line on the side of the top circle to represent the bunny's nose. Then, add curved lines on the bunny's face to help you determine the position of the eyes and mouth. These subtle curves define the contours of the face, guiding the viewer's eye and creating a sense of dimension.
The ears are perhaps the most recognizable feature of a bunny. Draw the ears; they are elongated, and slightly curved, with a hint of detail on the inside. Ensure the ears are proportionate to the head, as they add to the overall charm of the rabbit. Remember, the simplicity of the lines is the key to charming this animal.
As you progress, start to add details. Draw two small circles in the middle of the larger circle for the bunny's eyes. Draw a small circle for the little nose. In order to create the bunny's mouth, draw a curved line below the nose.
Consider the rabbit from different angles. This will allow you to create diverse depictions of rabbits. This step by step tutorial shows how to draw a rabbit from the side view and provides detailed illustrated examples for each step. Following simple steps, you can easily draw a perfect rabbit.
Remember, the best way to capture the essence of a rabbit is to observe and then recreate. Search for inspiration for your easy cute bunny/rabbit drawing ideas. Rabbits are adorable creatures that make perfect subjects for sketches and illustrations. The skills you learn here will help you on your artistic journey.
You'll find a multitude of resources to inspire your bunny drawings. Browse through illustrations and drawings online, or even visit local parks and observe them in their natural environment.
If you are interested in a more unique style, you can explore the realm of cartoon bunnies. From cute cartoon bunnies to realistic rabbit designs, these pages are perfect for kids and adults who love these furry friends. You may create a drawing of a cheerful rabbit holding a large carrot with both paws. The carrot's bright details and the bunny's happy expression make this drawing fun and easy to create for any artist. Next, draw the rabbit's face. Draw two curved lines to form the cheeks. Above them, enclose partial oval shapes. These are the rabbit's eyes. Within each eye, draw two successively smaller ovals and shade between them. Shade a small oval above each eye to indicate the eyebrows. Finally, once you've mastered how to draw a rabbit with this guide, you'll be ready to depict bunnies everywhere!
Step-by-Step Guide to Drawing a Bunny:
Step 1: Basic Shapes
Begin with two intersecting circles one for the head and a larger one for the body. Add a big oblong shape on one side of the body circle to represent the back or a hip.
Step 2: Head Details
Draw a curved line on the side of the top circle to represent the bunny's nose. Use curved lines on the face to help determine the position of the eyes, nose, and mouth.
Step 3: Facial Features
Draw two small circles within the head circle for the eyes. Add a small circle for the nose. Draw a curved line below the nose to represent the mouth.
Step 4: Ears
Draw the bunny's ears, which are typically elongated and slightly curved.
Step 5: Body and Legs
Draw the bunny's back and hind legs, the large hind legs, and a second shorter leg above the first. Join the head and top foot with a short rounded line.
Step 6: Finishing Touches
Draw the bunny's nose, eye, and tail. Consider adding a spring time feel to the bunny rabbit.
Whether its a cartoon rabbit, a realistic one, or even a bunny from your imagination, the skills you learn here will help you on your artistic journey.
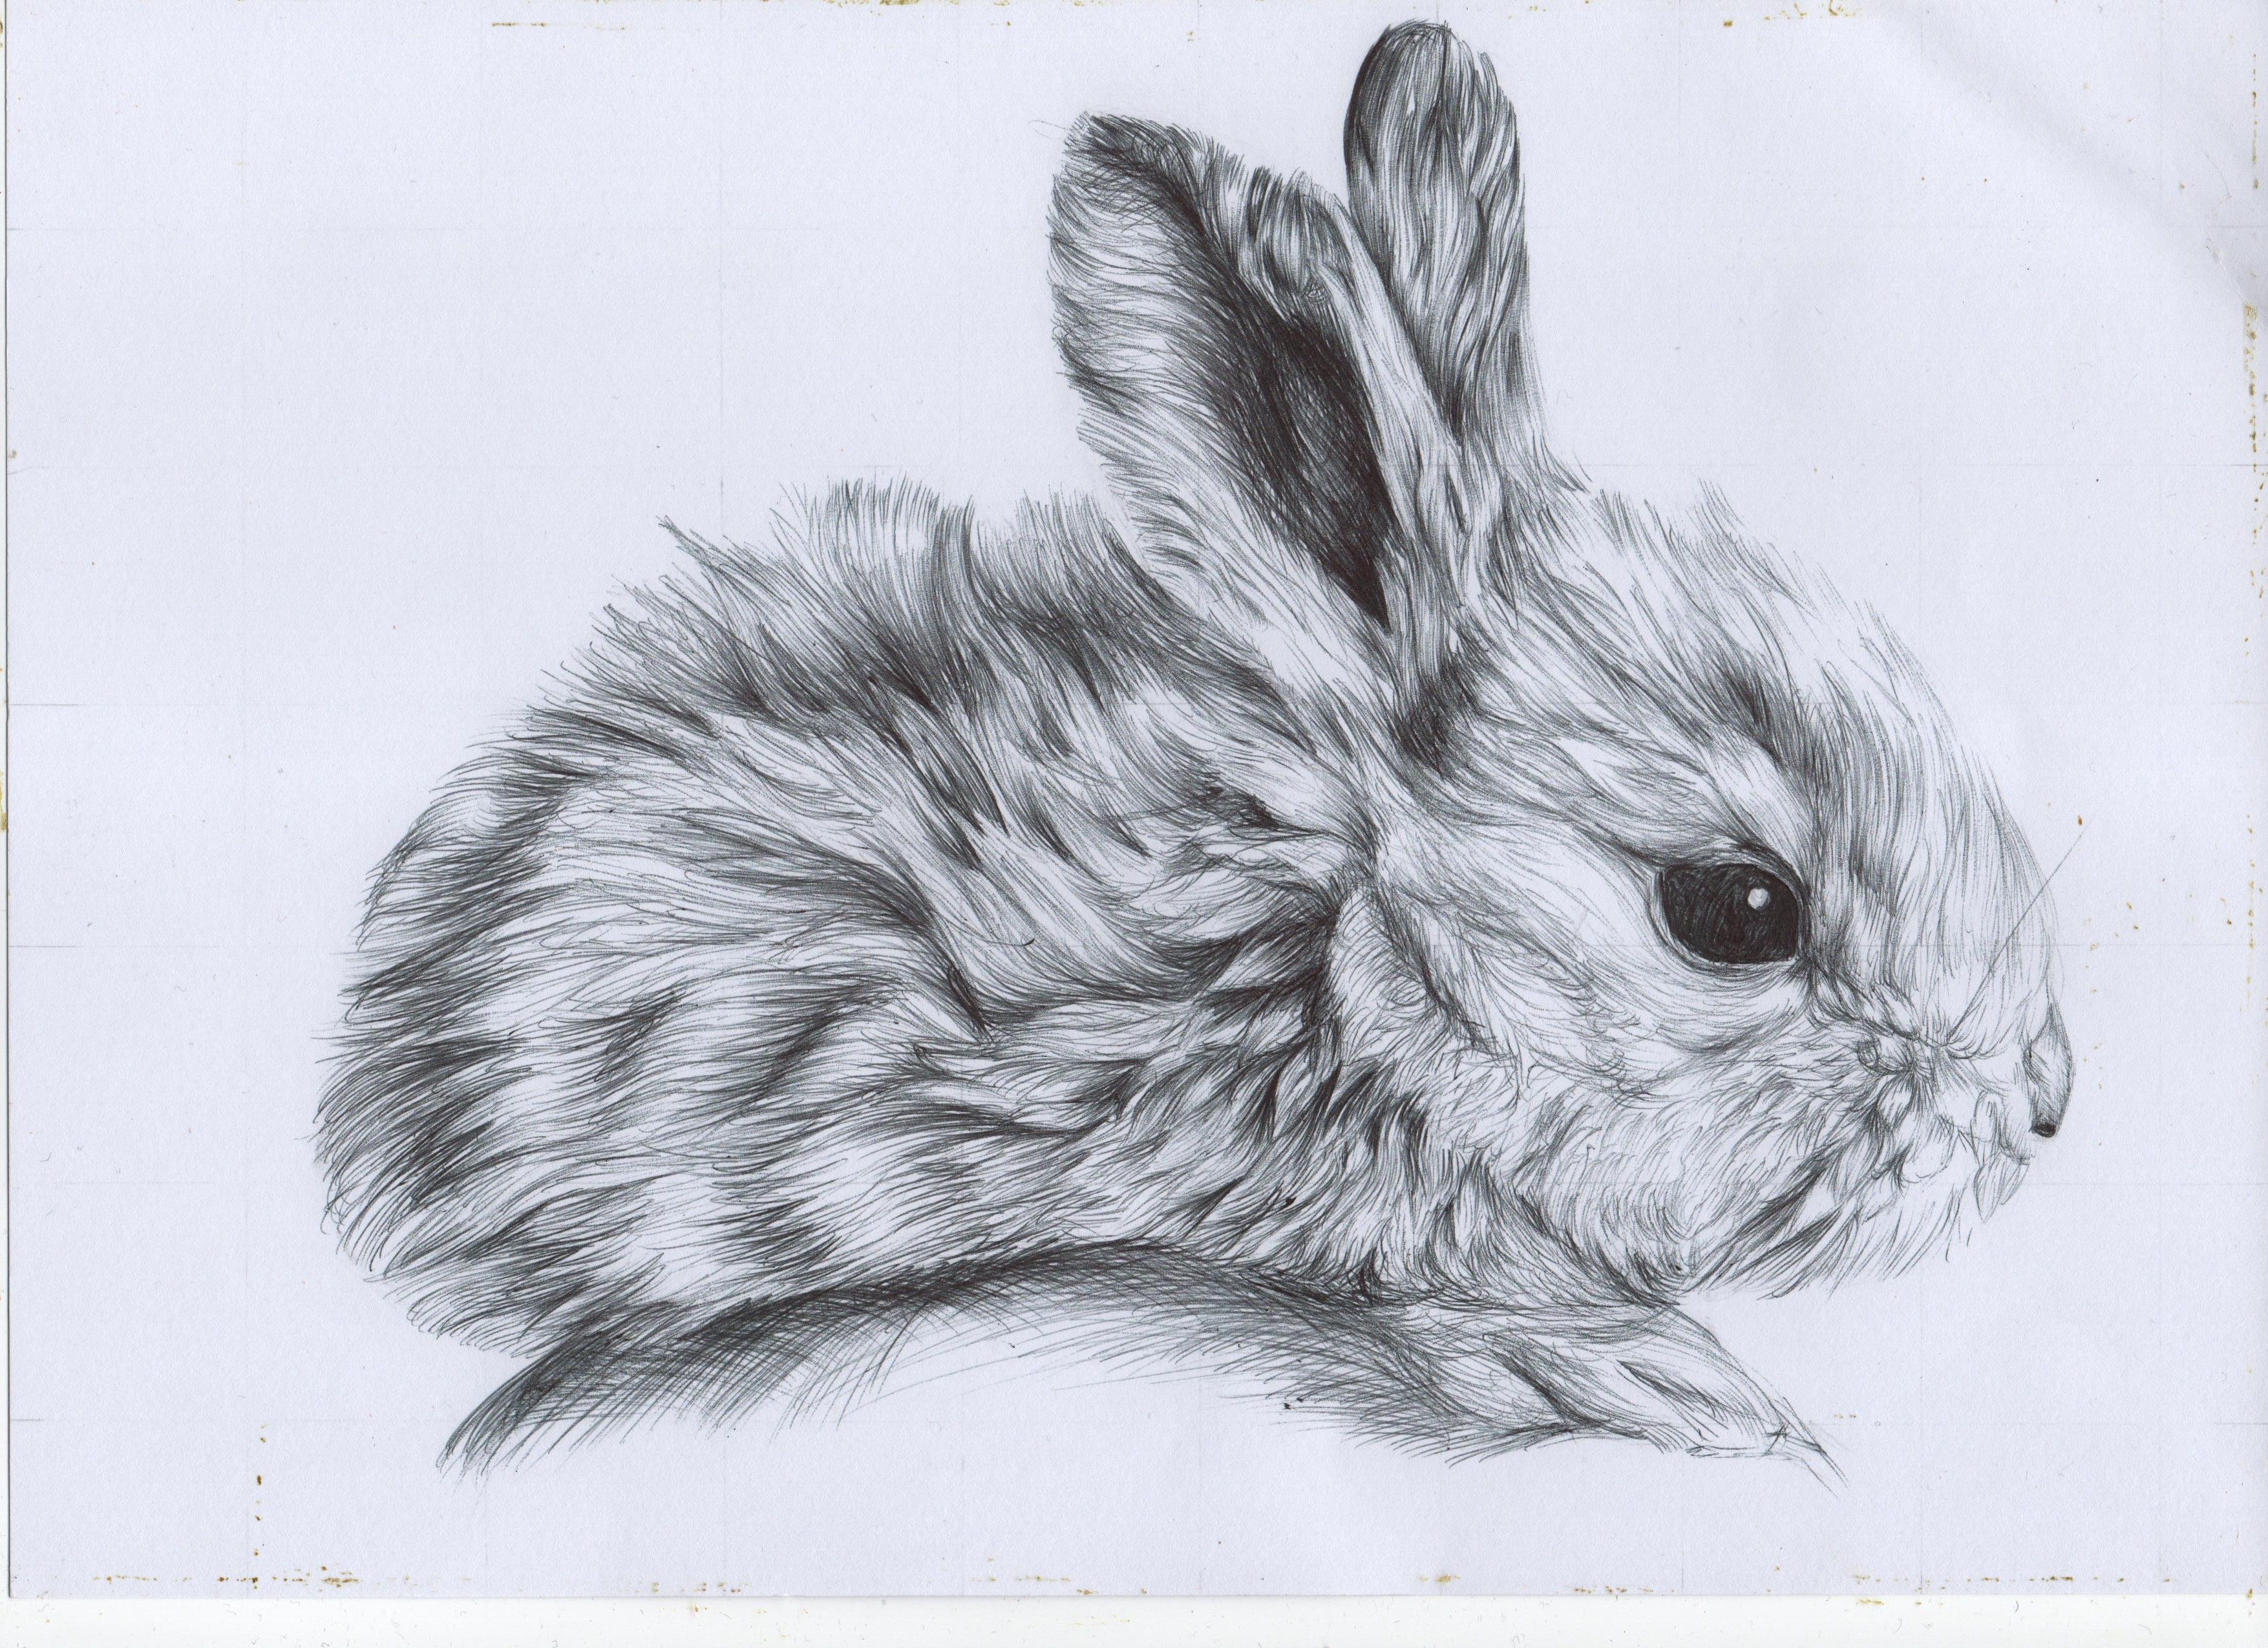
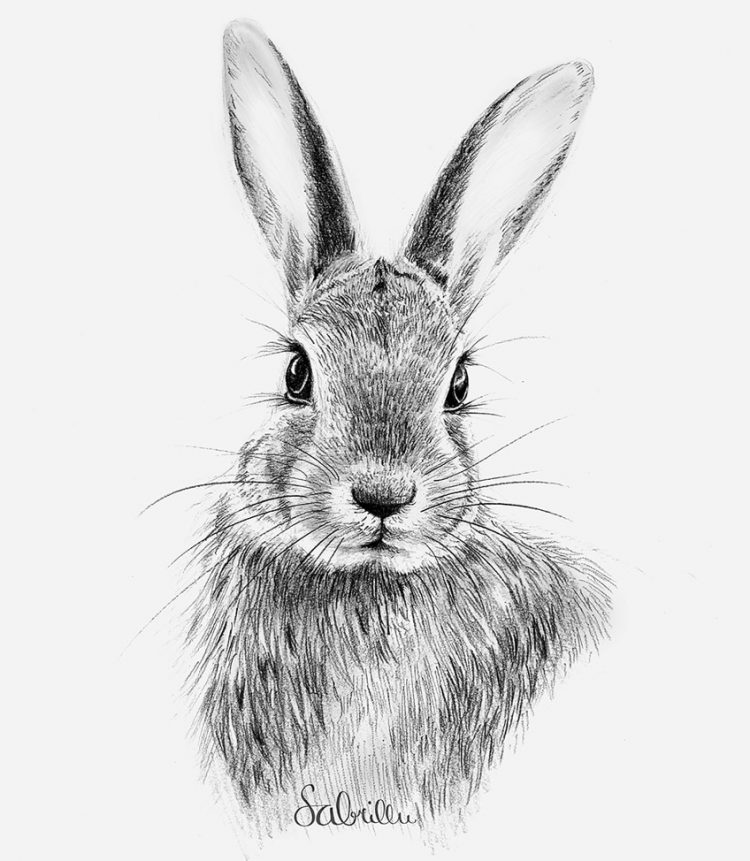
The first step in drawing any animal, including a rabbit, is to understand its basic anatomy. Observe the proportions of a rabbit: the length of its ears compared to its head, the size of its hind legs relative to its body, and the overall shape of its form. Use reference images, photographs, or even live observations of rabbits to get a good grasp of their structure. Before you draw your rabbit with different pencils, print out a black and white photo of a rabbit. The photo i used as a reference was taken by the wonderful photographer deena sveinsson.
Once youve established the basic shapes, start adding details. Draw two curved lines to form the cheeks. Above them, enclose partial oval shapes. These are the rabbit's eyes. Within each eye, draw two successively smaller ovals and shade between them. Shade a small oval above each eye to indicate the eyebrows.
The goal is to bring these adorable creatures to life on paper. By following the simple steps, you too can easily draw a perfect rabbit. The skills you learn here will help you on your artistic journey. So, lets grab our pencils and hop right into drawing!
When drawing a bunny, start by creating two intersecting circles, then add a big oblong shape on one side. Draw a curved line on the side of the top circle to represent the bunnys nose, then add curved lines on the bunnys face to help you determine the position of the eyes and mouth.
Next draw the first ear on the side and then add the second ear on the other side of the circle. Make a drawing of the bunnys face. Draw two small circles in the middle of the larger circle for the bunnys eyes. Draw a small circle for the little nose. In order to create the bunnys mouth, draw a curved line below the nose on.
There's nothing more adorable than a snuggly little bunny. From cozy designs to playful scenes, these ideas will help you bring your rabbit drawings to life! Drawing a rabbit is a rewarding endeavor that combines fundamental artistic techniques with a touch of lighthearted fun. Whether you're a seasoned artist seeking a new subject or a beginner taking their first steps into the world of drawing, the bunny provides a versatile and approachable subject, perfect for honing your skills and exploring your creativity. There's an inherent joy in translating the form of a rabbit onto paper.
Variations in Style and Technique:
1. Cartoon Bunnies: Embrace the simplicity and playfulness of cartoon styles. Focus on exaggerated features, such as large eyes, oversized ears, and expressive poses. Use bold lines, bright colors, and minimal shading to create a visually appealing character.
2. Realistic Bunnies: Capture the subtle nuances of a real rabbit's fur, eyes, and posture. Pay attention to details such as the texture of the fur, the direction of the light, and the shadows. Use a range of pencil grades to create varying tones and depth. Reference images are crucial for realistic drawings.
3. Bunny in the Wind: Create a dynamic scene by depicting a bunny in motion. Use flowing lines to suggest movement, and consider adding elements like grass, leaves, or a flowing scarf to enhance the sense of action.
Whether it's a cartoon rabbit, a realistic one, or even a bunny from your imagination, the skills you learn here will help you on your artistic journey.

